Now that you’re spending more of your days at home, it’s time to tackle those niggly issues that you never got around to addressing. The most common problems such as mouldy spots on the wall, or a slow-draining sink, that crop up around the home. Read more, ’10 Common Decorating Blunders You Can Fix Today.’
Here’s how you can save money by tackling them yourself.
With all the temperature extremes this year, many homeowners are seeing cracks in their interior walls. If it’s just a hairline crack caused by movement or a door repeatedly slamming, a competent DIY-er may be able to fix it. Image via UK Elle Decoration.
1. A Slow-Draining Sink
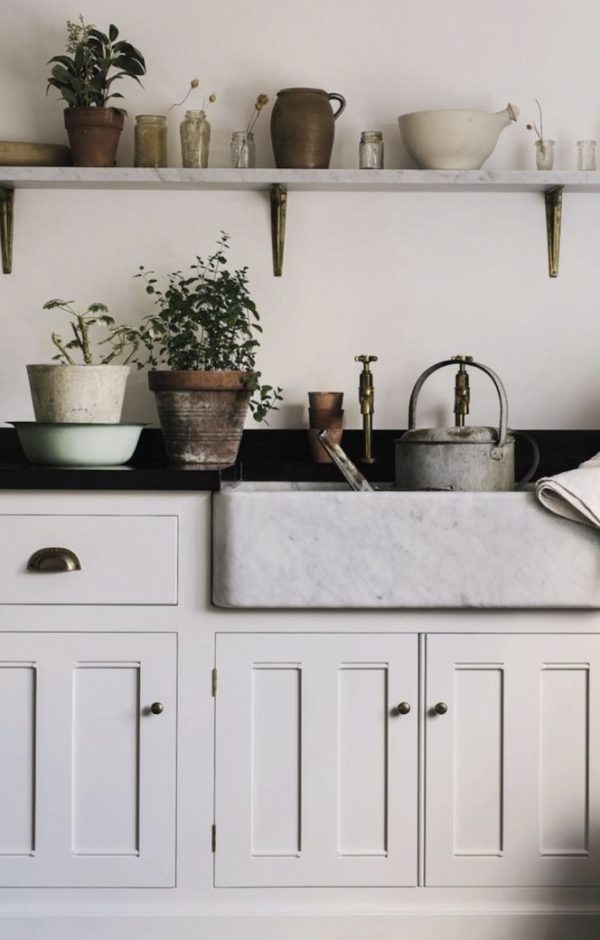
A slow-draining sink is a common problem in households and it’s generally caused by a blockage of oils, fats or sticky foods in the water trap under the sink. It’s generally an easy fix. Start by trying to clear the blockage with a clog-removing product such as Drano. If that doesn’t work, remove the water trap and give it a thorough clean. If neither of these steps work, it’s best to call a plumber. Read more, ‘Secret Service: The Hot List of Sydney’s Tradespeople.’
Tools you’ll need
You’ll need a product that cleans and removes clogs from drains, such as Drano. If it’s an oil clog, you’ll need a grease remover. If the blockage is caused by food solids, you’ll need to prise it out with something like a skewer. If you decide to remove the water trap and clean it manually, you’ll need to assess the nature of the clog.
How to prepare the area
If you are removing the water trap for cleaning, place a bucket large enough to catch the water content under the sink so it does’t spill onto doors or cabinets.
How to clear a slow-draining sink
Remove all excess water from the sink. Pour the clog remover down the drain, ensuring you follow all recommendations, including how much to use. If the blockage is caused by solids, prise them out with a skewer. If you decide to remove and clean the water trap, place a bucket under the sink before you begin.

A slow-draining sink is a common problem in households and it’s generally caused by a blockage of oils, fats or sticky foods in the water trap under the sink. Image via Waterworks.
2. Mouldy Walls or Ceiling
The best way to remove mould is with bleach – it’s not just a good cleaning agent but it also kills mould and bacteria and sanitises walls to prevent mould from returning. But you need to be careful with bleach as it can damage certain materials, such as marble and other natural stones. Always assess the wall surface before you select any cleaning product.
If you’re concerned about potential damage with bleach, use a natural vinegar solution to remove mould instead (it won’t emit a very strong smell like bleach either).
How to remove mould with bleach
You will need; Gloves; Bucket; Bleach (chlorine bleach is a good option); Water; Dusting cloths (preferably white); Ladder and a mask or scarf to tie over your nose and mouth. Use a diluted solution of one-part bleach to 10-parts water. Bear in mind that bleach won’t penetrate porous materials so if the mould is growing on plaster, grout or wood, it will kill mould on the surface, but not below it.
You can prevent mould build-up by:
Ventilating your home as much as possible, particularly any areas that have previously been affected by mould. Using an extractor fan in the bathroom, particularly when you shower, to avoid accumulating moisture. Keeping a squeegee handy in the shower and using it on the shower screens before you get out.
Step-by-step guide
Ventilate the room by opening all the windows. Put on gloves, cover your nose and mouth with a mask or scarf and make a solution of one-part bleach and 10-parts water in your bucket. It’s also a good idea to keep all the windows open for maximum ventilation. Dip one end of a cloth into the solution and squeeze it gently to remove some of the water. For mould high on your walls or ceiling, climb the ladder and start wiping away the mould, re-dipping other ends of the cloth until you have removed it all. Avoid using too much force – you don’t want to damage your walls or ceiling. You can make a fresh solution if the water gets too dirty or simply use a new cloth. Once the walls and ceilings are free of mould, take a dry cloth and press it against the damp areas to soak up as much moisture as possible. Avoid using water to rinse the wall as the bleach acts as a sanitiser and helps prevent more mould from growing.
To clean hard-to-reach spots, consider using an old toothbrush.
How to remove mould with a vinegar solution
You will need a Ladder; Spray bottle; White distilled vinegar; Firm-bristled scrubbing brush; Gloves; Clean cloths (preferably white); Sponge and Water. Pour vinegar into the dry spray bottle (do not mix with any water). Spray a good amount onto mouldy parts of the wall and ceiling Allow the solution to sit for an hour. Using a clean cloth soaked in plain water, wipe mould from the walls and ceilings. For hardened fungus and stains, scrub with a firm-bristled scrubbing brush. Dab the cleaned areas with a dry, absorbent cloth to soak up moisture. Keep the windows open to dry the area faster and to release the vinegar smell.

Melissa Penfold’s Country House features beautiful sash windows. Overpainting can often cause jamming when dry paint seals over the gaps and effectively glues the windows shut (this happens when the paint dries with the window shut). Photo: Abbie Melle.
3. Bulky bikes
Bikes can be heavy and cumbersome and if you’re living in a small home or apartment without a shed or garage, storing them can be an issue. Fortunately, there are many ideas and products that will allow you to keep your bike safe without cluttering up your interior.
How to store multiple bikes at home
Consider a freestanding bike tree or rack that stores multiple bikes vertically. As an added bonus, many of these systems don’t require any mounting or installation. Invest in a wall- or ceiling-mounted unit that stores multiple bikes vertically or horizontally, depending on your preference.
If you have a small amount of exterior space, consider installing a slimline bike box.
Tips for success
Seek out a storage option that keeps all your bike gear together to save on space and hassle. There are neat shelf-style storage options that allow you to hang your bike off the ground and store your helmet, shoes, gloves and other accessories in the same spot. When choosing a storage option, think about how often you ride and your strength and ability to lift and manoeuvre your bike. This will help determine the best type of storage system for your needs. For example, if you ride daily, you’ll want a system that allows you to put your bike away in less than a minute or two. But if you only use it occasionally, a system that takes more time and effort to use might be adequate.

There are many ideas and products that will allow you to keep your bike safe without cluttering up your interior. Image via Architectural Digest.
4. A Jammed Sash Window
Many older houses have beautiful timber sash windows. When they were new, the gaps between the moving windows (the sashes) and the window frames were small to stop drafts. But over the years the gaps become smaller and jamming can occur, mainly due to:
Overpainting – multiple coats of paint on the window frames reduces the gaps. Dry paint that seals over the gaps and effectively glues the windows shut (this happens when the paint dries with the window shut). The simple solution is to reinstate the gap so the moving parts can slide past each other.
Tips for success
Be patient. Be gentle: do not put too much pressure on the window when trying to release it as you could break the glass or damage the frame. When painting sash windows, move the windows up and down as the paint is drying.
How to fix a jammed sash window
You will need; A stiff; sharp-bladed knife; A thin, non-flexible scraper or a small pry bar; sandpaper; sanding block and safety equipment such as eye protection and gloves. Examine the inside and outside of the jammed sash where it meets the window frame. Identify where the joint between the two has sealed over with paint. Carefully cut through the paint and widen the joint. Insert the scraper into the gap and carefully separate the sash from the frame. You will be able to feel the remaining paint seal crack and the sash separate from the frame. You’ll probably need to do this in multiple locations around the window, particularly along the base. Attempt to lift the sash when you feel it has loosened as much as possible.
If the window is still jammed, you may need to use the pry bar between the base and the frame to leverage it up. Be gentle.
When the sash is released, use the scraper and the sandpaper to remove any excess paint on the sash or window frame. You can touch up these areas with new paint but make sure the window is open while it dries.

If you have a sash window that is jammed, you may need to use the pry bar between the base and the frame to leverage it up. Pictured above is the sash windows at Melissa Penfold’s Country House in Australia’s Southern Highlands. Photo: Abbie Melle.
5. Cracked Walls
With all the temperature extremes this year, many homeowners are seeing cracks in their interior walls. If it’s just a hairline crack caused by movement or a door repeatedly slamming, a competent DIY-er may be able to fix it. But if you suspect the crack is caused by a bigger issue, such as foundational failure or structural problems, you will need to call in a professional.
Tools you’ll need
With a plaster or gyprock wall, you will need the following: Scraper; Sanding block; Paint brush; Plaster; Plaster tape; Safety equipment, such as a face mask and safety glasses, to protect yourself from the fine dust when you’re sanding.
How to prepare the area
Arrange drop sheets around the area. Prepare a plan for how to tackle the job.
How to fix a hairline crack in the wall
Remove any loose materials from the crack. Apply a base coat of plaster followed by plaster tape and then another thin layer of plaster over the tape. You may need to repeat this process to adequately fill the crack. Finish off with a top coat of paint or finishing plaster to achieve a smooth finish. Sand this back.
Tips for success
It takes between six and eight hours for each coat of plaster to dry. You can speed up the process by using a heat gun or even a hair dryer – but only carefully and from a distance so you don’t damage the surrounding wall. Ensure that you fully sand the fixed crack before applying the top layer of paint or finishing plaster so no marks show through. For the best results, finish off by painting the entire wall.
Parts of this story are an edited extract from Houzz.com
